Sunday 30 March 2014

Babushka doll, how I make it

I admire to make Babushka - Matryoshka rag dolls. They are colorful, pretty and very decorative. In Russian folk culture Matryoshka doll is a symbol of motherhood


I have painted traditional wooden babushka dolls, but I like to create plush fabric ones better - but all my babushka dolls have hand-painted cute faces, so they are not identical, just look as a sisters )


Here I'll show you how I make the babushka doll:

1. Instructions for ordinary babushka doll


If you want to decorate you doll - easy to do this part of work now. You can do it then the doll is finished also. I do decorating before and after sewing. Decoratw full width of the dress part


Pin the two pieces together (as if the fabric was inside out) Keep the divide between the shawl and dress) according the line on the sewing pattern and mark the outline of the pattern (I use a special craft pen, but you can use a pencil).


Leave a gap at the base of the doll for stuffing. For the babushka doll with stable bottom (that can stand upright) see more description how to make it below.
Sew Front and Back together. Dont forget the gap!


2 Babushka doll with a stable bottom


2. Instraction for the stable bottom of the doll.
To make it clear this part of work I use 2 pieces of fabrics - front is yellow and back is red


Г shape unsewed parts of product let you make the stable bottom! The gap for stuffing is in the middle of the bottom


Oh! Almost has done!


Last step  is my favorite -  I use sewing glue or sew on the face of the doll and decorate her.

Hello! My name is Olivia!

Babushka rag doll

Tuesday 25 March 2014

Garden. How I have decorated my boring fence.

I  admire vintage willow pattern china! Love this white and blue color scheme, this miniature images and I would like to have numerous collection of this pieces! but now I have got  only a little bit of them and I have hanged my treasures in the garden


Perhaps it is an interesting idea to decorate a boring fences in the garden :-) All my finds came from thrift shops. 
According  my "willow pattern love" I have created a few plush toys of such fabric.

Tricksy snail (she loves tea parties)


and Russian Babushka rag doll


Even I have made a special order of 3 Babushka Dolls - ladies love willow pattern china as well!

Friday 21 March 2014

Beach girls are ready for yummy fresh berries cocktiles!

Rag dolls love to swim also! Nice beaches, shells, waves, fashion swimsuits, beach umbrellas and - of course ice-cream!  Lets have FUN with us!


Some curvy lady prefers the striped swimsuit !  Good fashion taste!

DIY A cozy cottage for fairy

I'm sure - everyone needs a cozy warm home to be happy. And I thought - once I sew a rag doll and toys, why not make a dream house for the fairies and share this idea?
So - lets make Fairy Cottage!


Free DIY with pics! Use your small pieces of fabric - do not throw them away!

Skills level - beginner and up 
Size approx.18 x 9 cm  (7.28" x  3.54")
Basic material - cotton fabric, filling material,  lace, trim, floral motives, buttons, beads and etc. as you wish and FUN!

INSTRUCTION


1. Sew together two pieces of fabric - our roof and walls.
2. Make a door for the cottage - attach lace as a first step. I have used a sewing press button to make a lock for the door.
3. I advise decorating the house according to your preference at this step - time to use your imagination! I have attached a lace sleeve pocket also - small, but I can put in a greeting tag, coins, small jewelry...Use a special sewing marker.  
4. I have sewed the door - for me it is easier to do this part of the work at this stage.
5. Draw a house pattern on  fabric pieces, do not cut. Remember the chimney! 1. - Stitch the house, 2 - cut ( left 5mm edge!) 
Fill the fairy cottage with your choice of  filling. Please remember - it is a nice opportunity to make a lavender sachet also!
6. Congrats! Lovely cottage - any fairy would like to live in such beautiful house!


In the Cherry Garden there is now a  Marshmallow Kingdom or Fairy Village!


Faeries know -to get a cozy cottage - the first step is just to think about it :-)


Here StudioFantasies you can draw your lovely dream house to order - what and where do you want to live! Wish and your dreams can come true!

Free sewing pattern


Wednesday 19 March 2014

Monday 17 March 2014

Tea party for rag dolls

Rag dolls decided to have fun! Pink Lady has made chocolate  cake-roll, Yellow Lady knows how to prepare lovely tea.  Even a small white cat loves a cakes also!


Would you like to join them?

Wednesday 12 March 2014

DIY decoupage for a decorative button


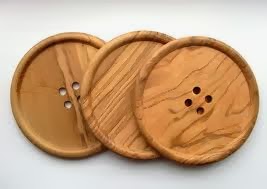
Sometimes I can not find an unique buttons for my creatures, but it is not a problem for crafty girl -  to make cute supplies by hand - it is easy and joyfully!

DIY lesson for the button for a plush toy made in decoupage technique, step by step.

Skills level - beginner and up.

Basic materials:

1. Scissors
2. Brush 
3. Thin paper (a serviette)
4. A pin


5. Craft glue and varnish for decoupage
6. Buttons (for the colored, plastic or wooden buttons you should cover them by special art acrylic gesso or white acrylic paint
before )


  I decided to make my own buttons from white polymer clay.


INSTRUCTION


 And - the handmade button as part of cute creature


Easy craft and cool result! 

More exquisite, lovely made and elegant products you can find in this salon - RinaArtDecor


Thursday 6 March 2014

DIY ROSE decor ( brooch, a pendant, sewing ornament) free lesson


Australia prepares for the autumn and winter months. It's time now to prepare and check our warm knitted gloves, hats, scarves and socks. 


Although nature is resting after its rapid flowering we have the opportunity to continue to enjoy the beautiful roses in  winter time - we can make an  elegant fabric rose, which will decorate nicely our warm winter clothes. 


It is a brooch, a pendant, sewing decor and a great handmade gift  also - depends of your imagination only.

Here is our free DIY lesson for you. Skill level - beginners and up.


Recommended textile for graft - any delicate  fabrics, our choice - pure silk chiffon.


Basic materials:
1. Brooch pin (for a brooch).
2. Two circles of felt - 5 cm diameter.
3. 4 squares of  fabric approx. 4x4 cm  for leaves.
4. Piece (a strip) of fabric  -  approx.
5 cm wide and 40 cm long  for the flower.
5. A few beads  if you wish.

 INSTRUCTION

1.  Sew on the first felt circle the brooch pin and put aside.
2.  Make the leaves  - see my diagram below how to do:


3. Sew the leaves onto the second circle. (pic.1)
4. Make a small knot of  fabric strip and sew on to the center of a circle. (pic. 2)
5. Twist the strip and sew on step by step as a spiral. (pic. 3)


6.
Cut off  any excess amount of the strip left over and  fix the end onto the back side of the circle.
7. Sew both circles together accurately at the edges. (pic. 5, 6)

Your gorgeous rose brooch is ready!  


 Chic classy look for winter - easy!

Thanks Tanya from elegant store Socksandmittens for permission to use the photos of her fabulous knitwear.


Tuesday 4 March 2014

DIY Fabric Easter Egg, Faberge styled.

Many people know the tradition of giving eggs at Easter time. Also, in the history of jewelry art there is the widely known and exquisite precious eggs made by Carl Faberge . Made of gold, silver and colored enamel and richly adorned with diamonds , pearls , rubies, sapphires and other precious gems , these decorative Easter eggs were the subject of deserved acclaim and admiration .


We have combined these two traditions to make to produce exquisite handmade fabric Faberge styled Easter Eggs. 
You also can learn to make these gifts for your loved ones at Easter - and you only need  ... 2 small pieces of fabric (silk, linen, cotton, felt, calico cloth and others) and your imagination with our step by step instructions!


So - stylized fabric Faberge eggs by your own hands.

Skills level - beginner and up. Size 11 cm (4.33")
Materials - fabric, synthetic or natural filling, decorative elements.


1. Draw a pattern of the egg on  fabric pieces, do not cut
2. Сut the egg`s pattern after sewing. Stitch a holes in the edges (pic. 3)


3. Fill the egg by your choice of  filling. Please remember - it is a nice chance to make a lavender sachet also!

4. Stitch the bottom of the egg.

5. The egg is almost has done! Choose a beads, lace, ribbon and etc. to decorate your precious Easter Egg!


6.


Use your plush Easter Egg as an aroma sachet. Drip 2-3 drops of high-quality aromatic oil (rose, lavender, orange, verbena) to the bottom of the egg. 

Happy Easter!

If you do not know where to get  beautiful beads to decorate your Easter Eggs - small tip for you -just check nice White Giraffe shop